Making a Book Cover with a Window
The challenge of adding a window
Creating a widow or recess in your book cover adds a unique and interesting feature to your book, but it also presents a unique set of challenges if you want to cover it with paper or bookcloth. It’s a challenge because the opening forces the covering to go the opposite direction of what you’re used to when covering the corners of your bookboard.
Inside corners don’t have enough material
When you cover the outside corners you generally need to reduce the bulk of material while leaving enough behind to cover up the bookboard, so you need to cut material away. But with a window the problem is just the opposite. On inside corners you don’t have enough material to hide the bookboard at the corners. So the challenge is to find ways to cover up those exposed inner corners.
This tutorial will show you several different ways to deal with that problem. As a bonus, I’ll show you a few fun embellishments you can add to a book or box cover.
Cut your bookboard
The first step, obviously, is to figure out what your project is going to be and then cut the hole in the bookboard.
Prepare your bookcloth
Then you’ll want to prepare the covering you’re going to use. I have found that bookcloth is easier to use on the outside covering of these windows because it stretches a little bit and also doesn’t tear.
You’ll see why this little bit of give is important once I start on the process of covering the window. You can use paper on the outside, as well, but you’ll have to take greater care with it, as it will tend to tear.
Making bookcloth
Bookcloth has a backing, usually of rice paper. In addition to making it stronger it also helps helps stabilize the fabric and makes it more appropriate for gluing. If you want to learn how to make your own bookcloth I have a couple of videos showing you how. You can view those here (Making Bookcloth), and here (Making and Printing on Bookcloth).
Start by gluing the bookcloth to the bookboard
The first step, no matter what you’re going to be doing with the window ultimately, is to glue the covering to the outside of the front of the bookboard. Use PVA glue for this. Press the two pieces together firmly and put this under a weight to dry. It doesn’t have to be thoroughly dry for the next step, just reasonably attached.
Cut open the bookcloth to reveal the window
Next, you’ll want to cut open the bookcloth or paper that covers the window. Cut this from the inside so you can see the bookboard and cut it corner to corner. But, don’t cut right up to the bookboard. Cut about 1/16th of an inch from each corner. This will leave you a little material to push into the corner.
Remove the center material
Next, cut out the center, leaving about ½ to ¾ of an inch margin all the way around. This will be the part that you fold over the edge of the window and glue to the other side.
Finish the outer corners
The method for finishing off the outer corners of your cover are typical of any book cover you may have already made, so I won’t go into the details of that in this video. If you’re unfamiliar with how to finish those outer corners you can watch my brief video here: Making Perfect Book Corners
Glue down the margins inside the window
For the window, start by gluing down the margins. Push these over the edge of the bookboard and use your bone folder to push as much material as you can into the corners. This is one reason I like to use bookcloth rather than paper if I’m creating a window because the material will stretch a tiny bit, if forced, and you don’t have to worry about tearing it.
Follow this same process with all of the window margins. Once you’ve glued them all down place the cover under a weight to dry.
Cover the inside of the book cover
The next challenge is covering the opposite side of the book cover, if this is your intended use for the window. Normally that inside covering paper would be cut ¼ inch smaller than the cover and, in theory, the window. But, as you can see, this doesn’t work for the window because there isn’t any bookcloth in the corners. You’d leave bookboard exposed if you did this.
Cut the window in the covering a little smaller
So, you’ll want to cut that paper ¼ smaller for the outer edges, but the exact dimensions for the window area. You might even want to cut the window a tiny bit smaller than the bookboard window so you have a little extra to push over the edges, as you’ll see in a minute.
Glue this piece in place
Turn this piece over on a piece of scrap paper and apply PVA glue to the entire surface, making sure all of the outer edges are thoroughly covered as well as the edges around the window.
Place this on the bookboard, being particularly careful of the placement around the window area. You want this to be as precise as possible.
Use your bone folder
Press all of this down firmly with your bone folder, using a barrier paper to make sure you don’t mar the paper. It might be a bit fragile at this point because it will be damp from the glue.
Then spend a few minutes firmly pressing the paper down around the window edge. This is where you’ll see the advantage of having a little extra on those edges. Between the bit of extra bookcloth that you can push into the corners and the little bit of extra paper, you should be able to completely cover up all of the bookboard at those inner corners.
As always, place this under weight and let it dry.
Here’s another technique
So, this next method starts out exactly the same way as the first method by gluing the bookcloth to the outside after you’ve cut the window in the bookboard, then trimming the bookcloth in the window area leaving margins that you can fold over and glue to the back side.
Then trim the bookcloth in the window area leaving margins that you can fold over and glue to the back side.
Cover the inside corners
Now, before gluing down the margins, cover the inside corners with something else. You could use scraps of bookcloth, paper, rice paper or, as I’m using here, Washi tape. I like using this tape because it’s thin and has its own adhesive.
Choose something that has a color or pattern that will blend in with the bookcloth you are using, so it will basically disappear.
Use small pieces
Cut small pieces of whatever you decide to use and cover the bookboard at the corners. Obviously, if you’re using something other than tape you’ll need to glue these pieces down.
The goal with these small pieces is to cover the corner area, and using smaller pieces makes this easier. Use your bone folder to force the pieces into the corner, if necessary.
Now glue down the bookcloth
Once you have covered all of the corners you can glue down all of the bookcloth margins, just like the other method.
Once again, try and stretch the bookcloth at the corners a little if you can, using your bone folder.
Now it just needs to be glued to the appropriate box segment to finish off the window.
The window allows you to add an additional decorative element to this kind of box without harming the integrity of the box itself just because of the nature of how a clamshell box is constructed. You can see my detailed videos about constructing a box like this here:
This last method isn’t technically a window at all, but the process is similar so it seems appropriate here. For this cover I‘ve embedded some lego pieces that can be built upon with more lego pieces. This method would also be useful if you wanted to place any sort of object into a depression on your cover. For instance, you might fill the hole with another piece of bookboard that has been covered with a different fabric, or one of those photos that has been embedded in acrylic. Lots of possibilities.
The key to this method is that you will have two or more layers of bookboard, depending on the depth of the object you want to embed. In this case I have two layers with holes cut into them to match the thickness of the lego, and then one more piece of bookboard for the backing.
Cut all of the bookboard according to the needs of your project. Make the holes a little bit larger than the object because you will be adding bookcloth around all sides of the hole and this will add some thickness.
Glue the pieces together using PVA glue. Place this cardboard sandwich under weight for a little while to insure that the pieces are firmly glued together.
Then cover the front surface. Once again, I recommend book cloth for this instead of paper so that it will stand up to the stretching and manipulation that you will need to do. It’s helpful to draw guidelines on the backside of the book cloth to make the placement easier.
Apply glue only to the uppermost surface of the cover. Don’t apply glue yet to any of the recesses you’ve cut. Press this firmly onto your bookcloth, turn it all over and use a bone folder to press it down.
I usually put some weight on this for a little while. By the way, in this case when I say “a little while” I mean minutes, not hours.
The next step is to cut open the bookcloth that is covering the windows. I usually have a template that was used to create the original holes, and I use this same template now to figure out where to cut the fabric, since the holes are temporarily covered up.
Cut across diagonally, but don’t cut all the way into the corner. Stop about a 1/8th to 1/4th of an inch short of the bookboard at each corner.
Once you have the fabric cut open, firmly press it down along the edges of the bookboard, forcing it into the corners. Then glue all of these flaps down. You can use your bone folder to push the bookcloth firmly into the corners, but be careful not to push too hard as it’s possible to split the fabric.
If you already have the object ready that goes into this recess then you can glue that in now, and weight everything down and let it dry.
So, those are some ways that you can add a window or a recess to a project.
Next, I’ll show you a few things that you can do to add embellishments to a window or a recess.
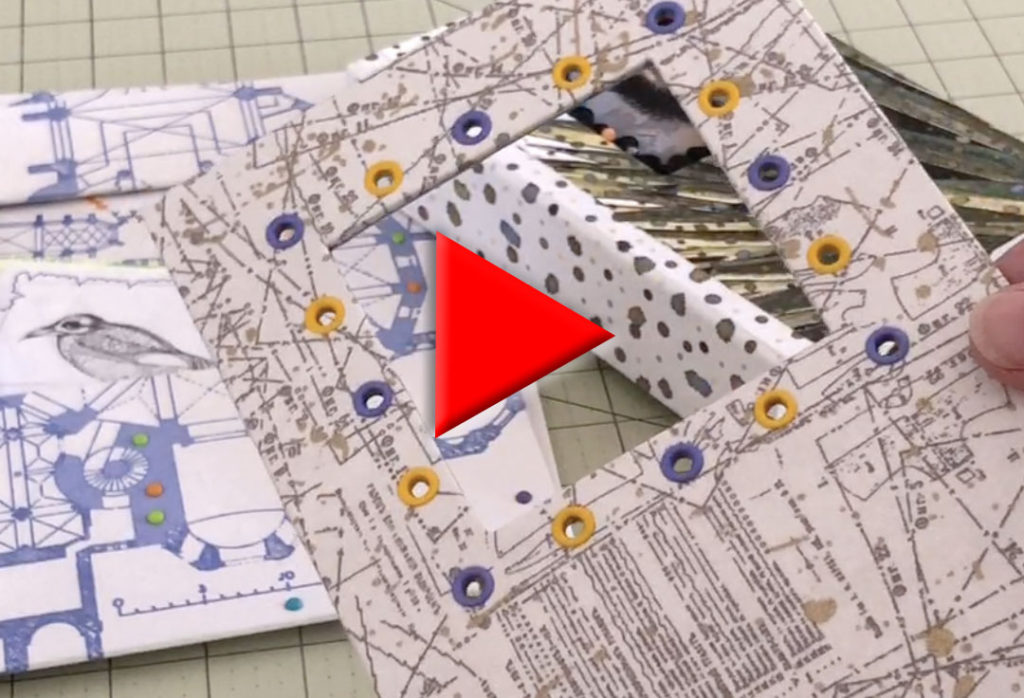
One of my favorite things to use are eyelets. These are really simple to add if you have the right tools to punch the starting holes and set the eyelets. I have a lot of different hole punches, but my favorite tools for this are the Crop-a-diles made by We R Memory Keepers. I have the regular punch as well as the Big Bite. The Big Bite is ideal for those areas that aren’t right on the edge and are impossible to reach with a regular punch.
They both punch two different size holes – 1/8th or 3/16th-inch hole – and will accommodate eyelets with those base sizes. Eyelets come in a wide variety of colors and also in a standard or wide format.
Some eyelets come as two pieces and have a backing that finishes off the backside, and some come as just a single piece, so the backside isn’t quite as finished looking. These Crop-o-diles will accommodate either kind as well the variety of sizes.
If I’m using the one-piece eyelets I sometimes find that I want to cover up the backside because it looks a little unfinished. This presents a problem because you don’t want to cover up the hole. If the project is appropriate for it, I’ll use Washi tape to cover the back of the eyelets and then just re-poke the hole through the tape.
The natural adhesive is pretty weak on this kind of tape, so for this particular application I fortify it with a glue stick and burnish it down with a bone folder to make sure it stays stuck.
You can use anything sharp to re-poke the holes, even a sharp pencil will work. Do this right away, while the glue is still wet so that you can press the tape down around the edges of the eyelets for a clean, finished look.
I will also sometimes go back over the tape with a very thin layer of PVA glue once I have everything the way I want it. This ensures that it stays put. You want to keep the layer of glue pretty thin otherwise it gets a little shiny, which I don’t care for in this context. I want the tape to keep its original look.
In addition to eyelets, you can also find a wide variety of colorful brads to use to decorate your covers. The Big Bite Crop-o-dile comes in handy for this process, as well, as it punches a hole small enough for these tiny brads, and allows me to punch a hole pretty much wherever I want.
When I add brads to a cover I always do it before I add the paper to the other side because I don’t like to leave the prongs exposed. This is another case where I prefer to use bookcloth instead of paper because the extra thickness of the bookcloth helps hide the prongs of the brads. You can barely feel them once you’ve glued the bookcloth in place.
Remember to make the hole for the window just a little smaller than the actual hole. This will give you a little extra material to overlap the cover material, pushing that little bit of extra into the corners and ensuring that the bookboard is completely covered. It also just makes the edge look a nicer.
Another thing you can do to add some alternative design work to your covers is to sew on the bookcloth before you adhere it to the bookboard. If you have a sewing machine that gives you a choice of decorative stitches, this is a good opportunity to use some of those. You can also attach other items to the cover by sewing them on.
You can do this for the inside or the outside of your bookcovers, or even for the pages of the book. This is a technique I use a lot when I’m making a scrap journal. I have a video on making a scrap journal that you can view here:
There are also a lot of different objects that you can add to your projects.
This clamshell box was all about the Joshua Tree, so I glued some actual Joshua tree seeds around the inside edges of the window. I added some beads just for a little color.
You can get all sorts of interesting beads and these are another way you can dress up your projects, using them as clasps or closures, or just sheer decoration.
There certainly is no limit to the variety of things you can do to a book or box. This video is only meant to give you some starting ideas, and is by no means definitive. If you have some fun ideas that you’ve tried or have been thinking of trying, please share them in your comments below.


