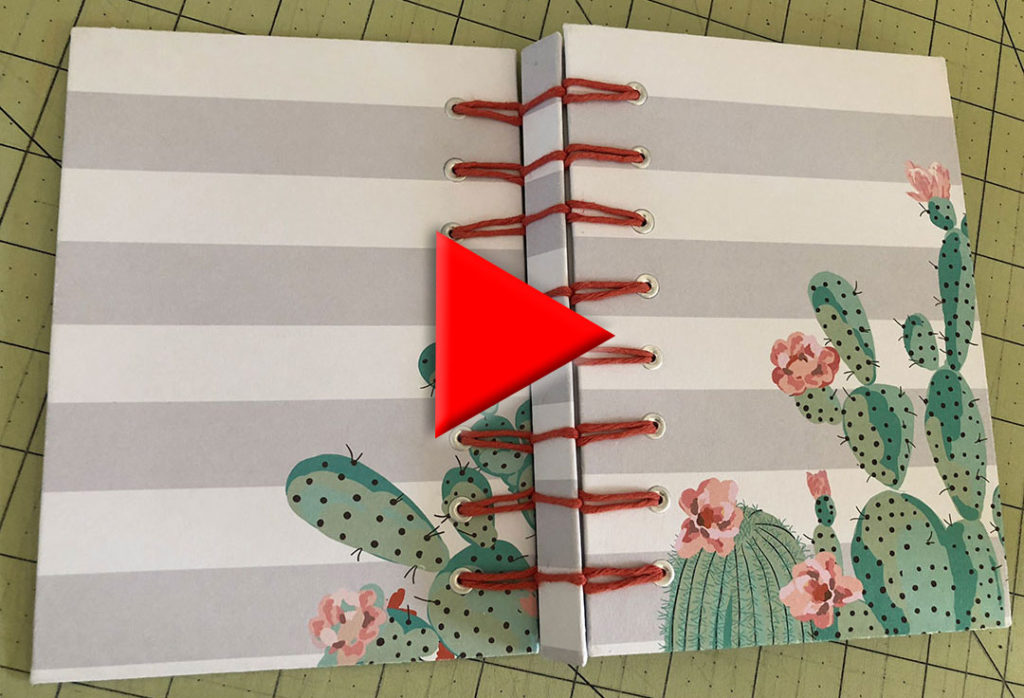
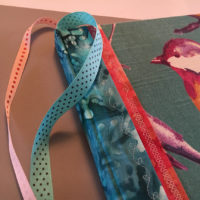
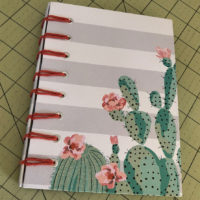
 Hedi Kyle is credited with rediscovering this binding method, which is attributed to the Belgians. However, Wikipedia and other sources claim that this binding method was invented in the mid-1980s by Anne Goy, a Belgian bookbinder. What makes it secret, I guess, is that we don’t know who to attribute it to.
Watch the following video or use the written instructions to learn how to make this lovely book.
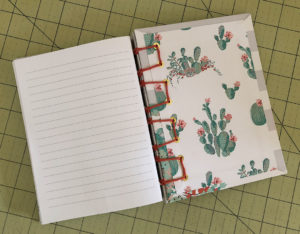 The cover for this interesting and unique binding is created separately and then the signatures are sewn in one at a time. The final result is a beautiful binding that looks complex and intricate, but is actually very simple once you see the pattern and get into a rhythm with the weaving of the cover.
The spine is completely separate from the two covers and is held in place only by the tension of the weaving. It has the advantage of lying flat when open, but one of the coolest things about this particular binding is the way that you can fold either cover all the way back. This is a real advantage while you are writing or drawing in the book.
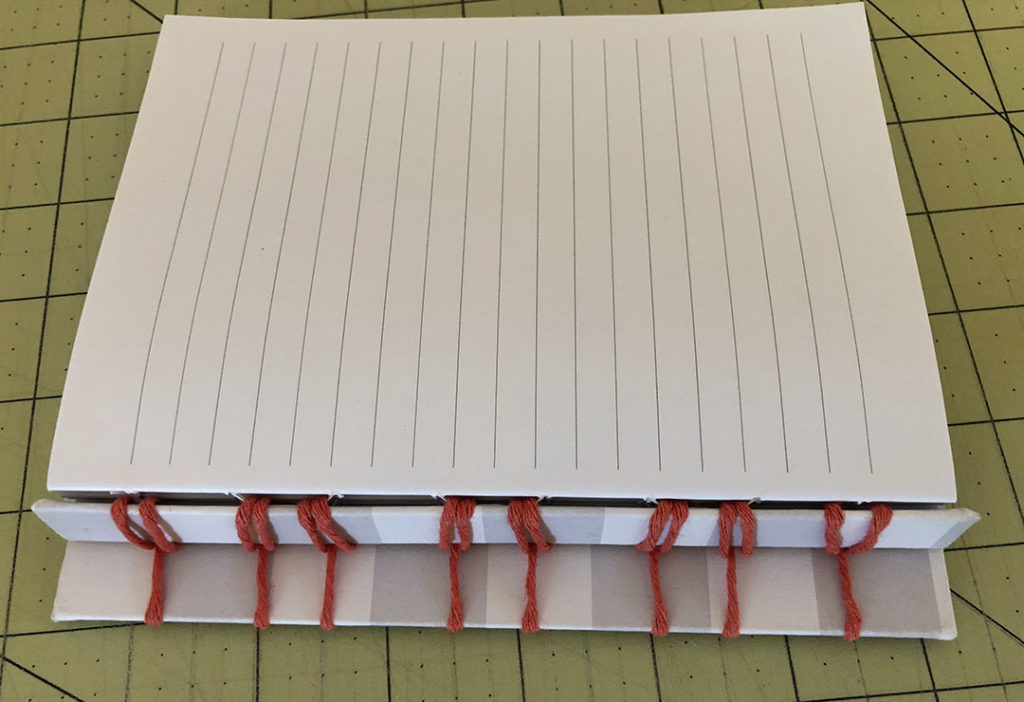
You’ll want to prepare your covers first. For the sake of keeping these instructions brief I won’t share how to do that here, but if you need instructions on creating and covering your covers you’ll find that information in this video.
This binding has one extra cover piece – the narrow spine piece. You can cover this the same way you cover the other two boards.
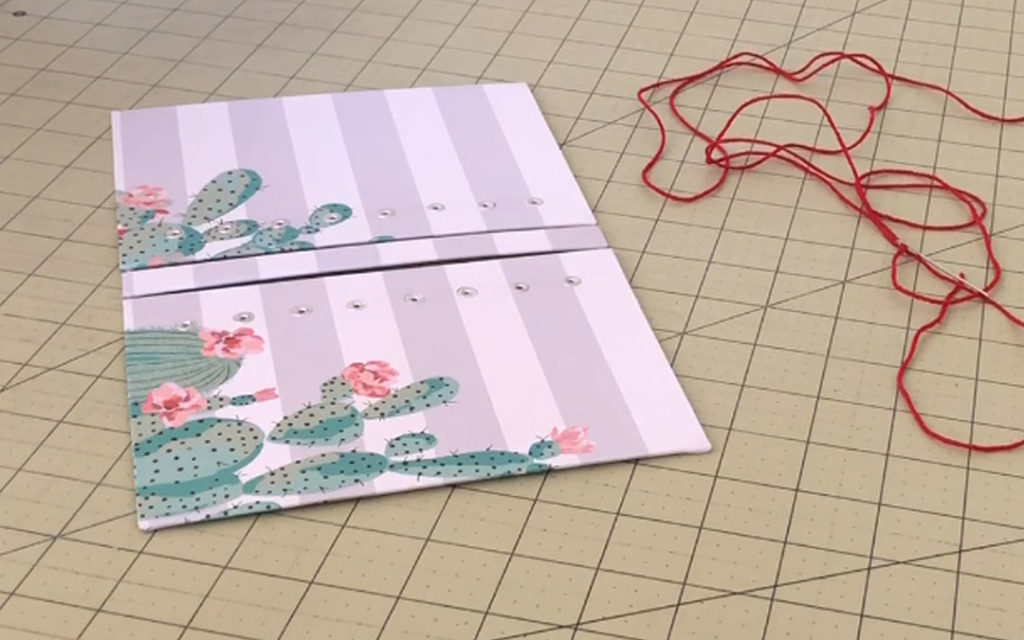
This piece should be the width of the thickness of your combined signatures, plus a little bit extra so your book doesn’t spring open, so you’ll probably want to prepare your signatures first so you know how thick this piece will need to be. When figuring out the dimensions for your covers leave about a sixteenth of an inch on three sides, not including the spine.

Once you have the boards covered you’ll want to poke holes to weave the covers together. I always create a template so that my boards and signatures are all marked identically. For this binding you will need an even number of holes but they don’t need to be evenly spaced, if you want a look that is more asymmetrical.
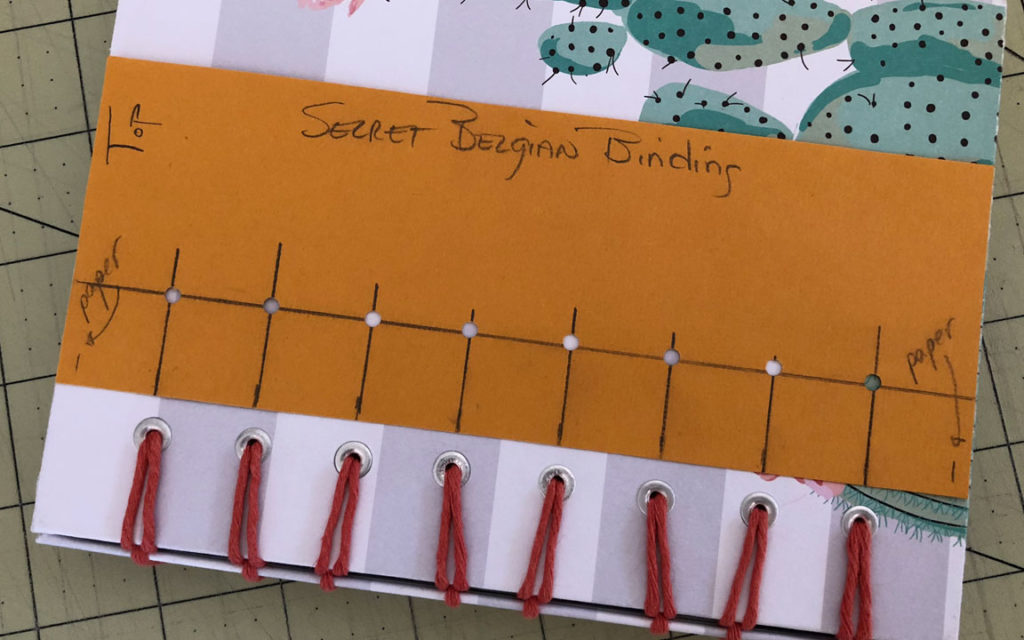
Use a heavy thread for weaving the book covers together and a lighter thread, like bookbinding linen thread, for attaching the signatures.
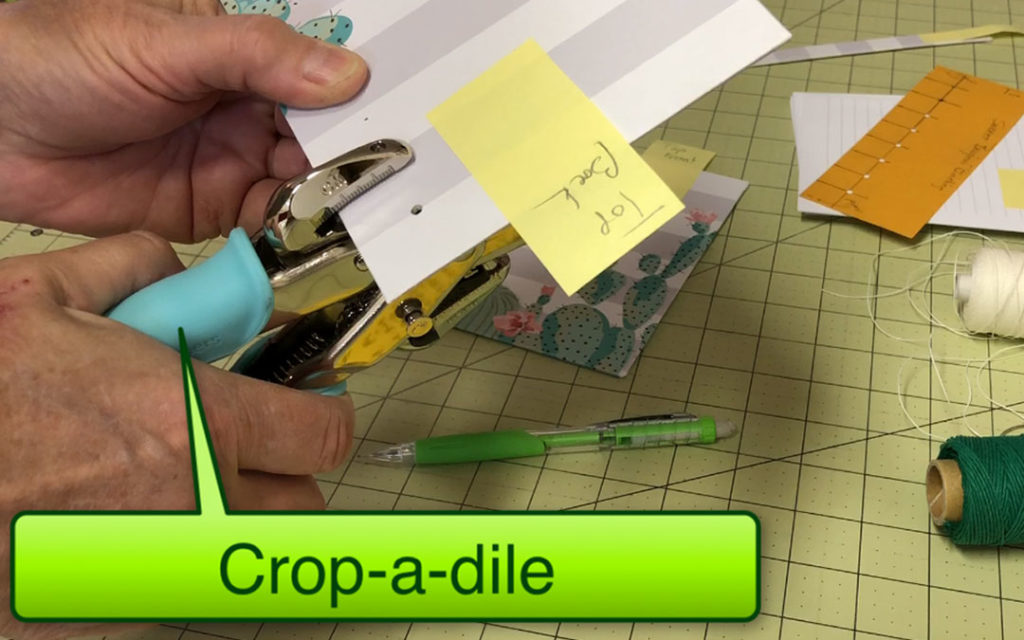
If you are using Davey board or another heavy bookboard you will need an awl or a hole punch to create the holes. I like to add eyelets to the holes because it reinforces them and adds a decorative, finished touch, but this step isn’t necessary. I use a great tool called a Crop-a-dile that lets me punch different size holes as well as attach a variety of different sizes of eyelets.
You’ll want a lot of thread for weaving the covers together. For this very small book I spooled off probably 5 feet of thread and it was still barely enough. You can always add thread, but I’d rather avoid that if I can.
I also use a blunt needle for this first part. You’ll be going through each hole twice and a blunt needle will help you avoid sewing through the thread that’s already there.
Next you’ll want to arrange the cover pieces and then tape them together to stabilize them while you sew. Leave about a sixteenth of an inch between the covers and the spine. I like to tape them together with painter’s tape – the kind that’s made for sensitive or delicate surfaces. It should peel off easily once you’re done without damaging the paper or the cloth covering your book.
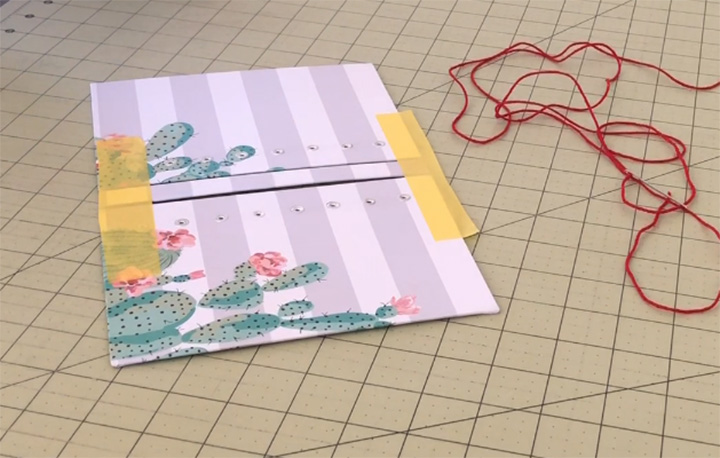
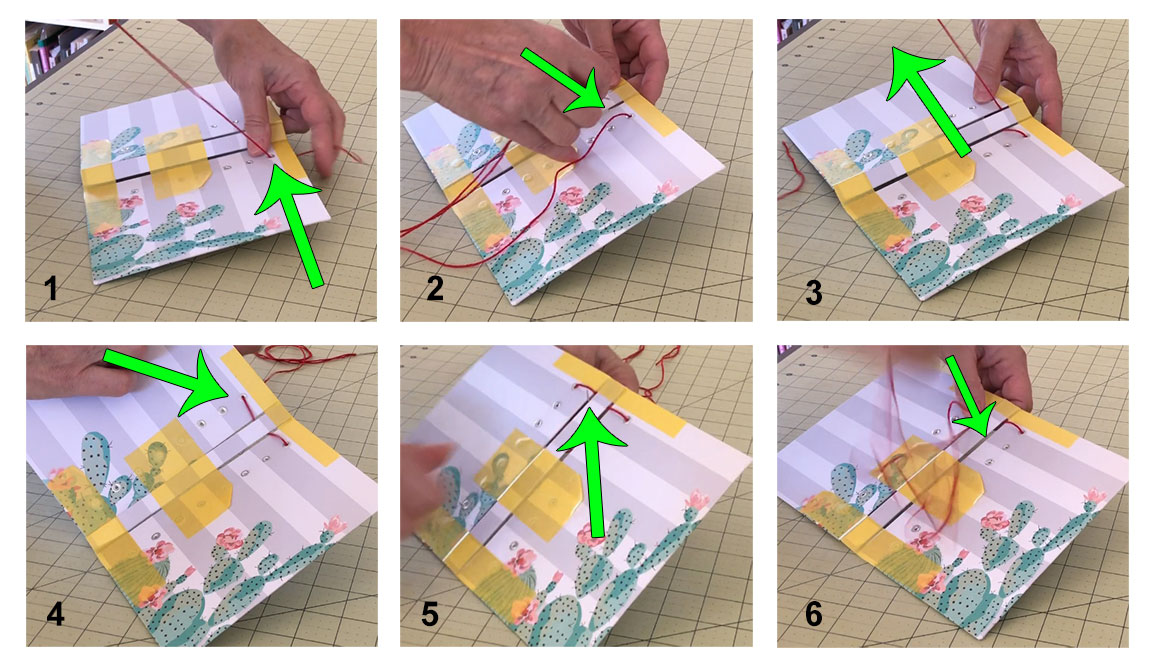
Start sewing from the inside of the cover to the outside, leaving at least a three-inch tail of thread (Fig. 1). You’ll need this to tie a knot in a minute. Weave under the spine (Fig. 2) then back up to the front of the covers (Fig. 3), then down through the hole in the back cover (Fig. 4). You’ll now be on the inside of the covers. You don’t have to worry about snugging this up yet.
Bring the needle back up between the back cover and the spine (Fig. 5), making sure you’re below the previous stitch.
Loop over the spine and back down to the inside of the cover (Fig. 6).
At this point you will snug up the thread and tie off that loose tail. This will be the only time you tie a knot until you get to the very end.
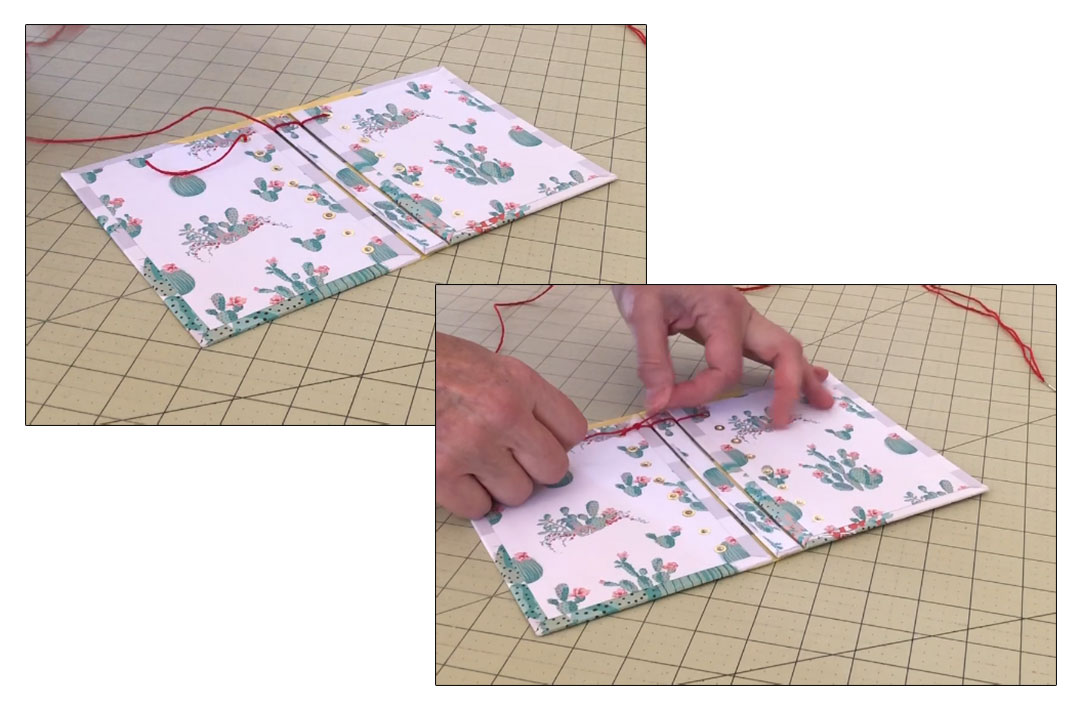
Now go back up through that hole for the second time. On the front you will weave under the spine, below the last stitch, then back up to the front and down through that first hole again, ending up inside the cover.
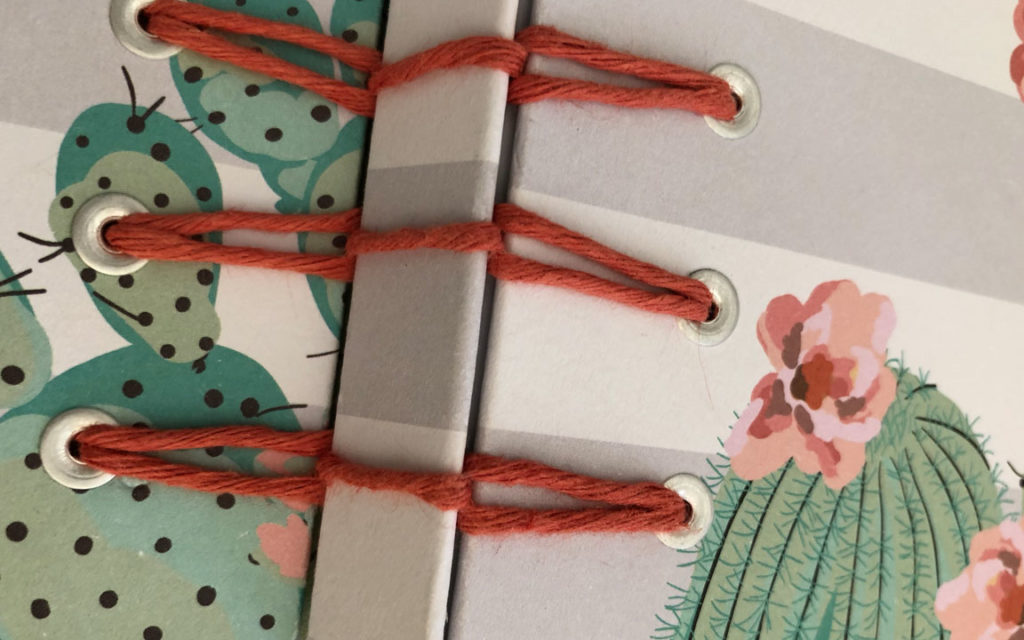
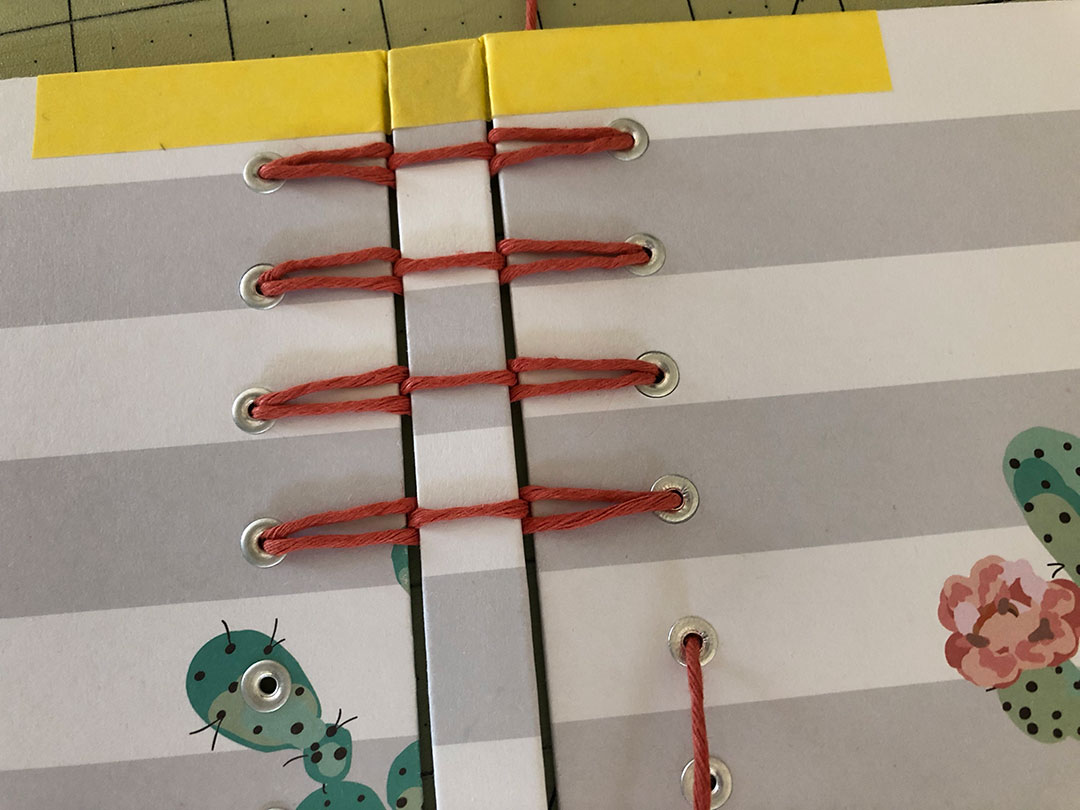
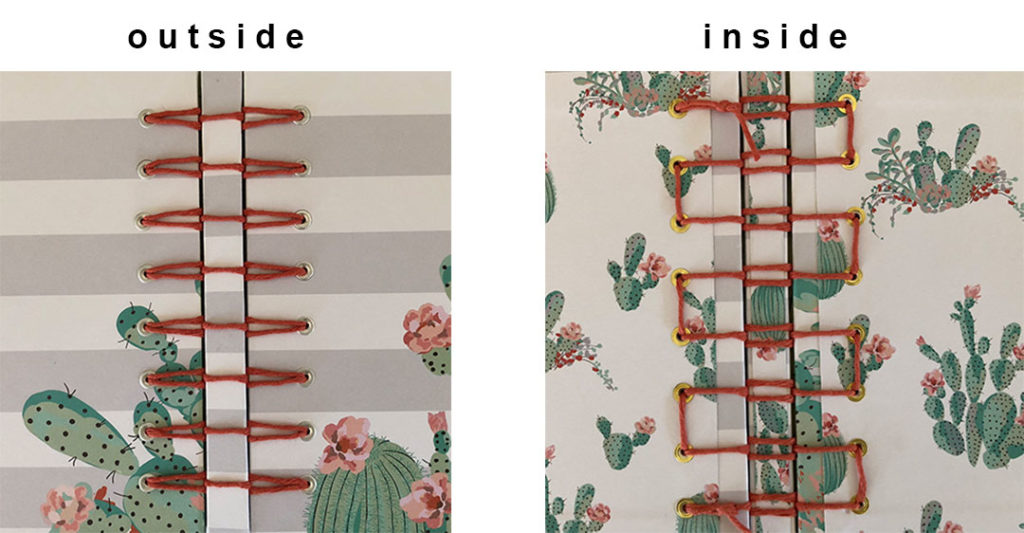
Here’s what the pattern should look like on the outside of the cover:
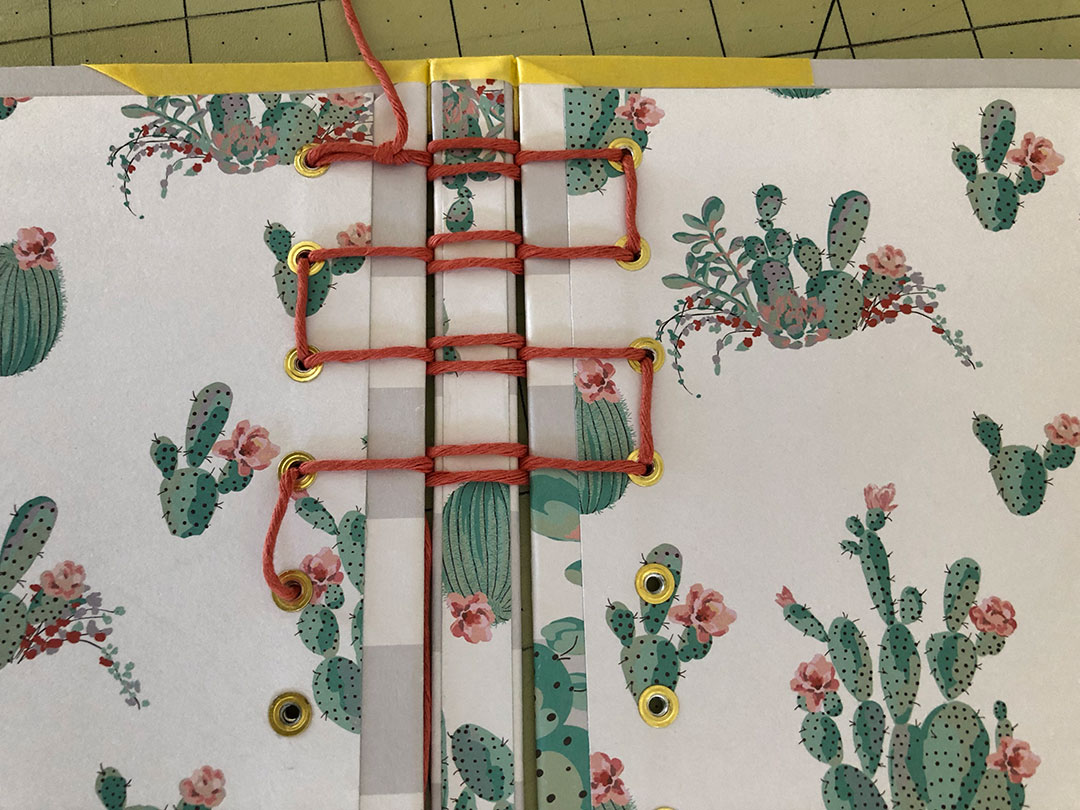
On the inside of the cover you will step down to the next pair of holes. This creates the ladder effect that you get on the inside.
To make the final pattern work out correctly, always make sure you bring your needle back in below, not above, the previous stitch. This will ensure that you are creating the correct pattern, front and back.
Once you do the entire stitch through one set of holes, you will totally get the pattern of the weave. It’s actually much harder to describe than to do.
When you get to the last hole you will tie off your thread and trim the tails. In my example I barely had enough thread to finish this off, so be generous with the thread you start with.
If you’re using a particularly heavy thread you might also want to use a bone folder to flatten the knots.
Now your cover is finished and ready for the signatures to be sewn in.
You’ll find more detailed instructions for preparing your signatures here (you only need to watch the first few minutes), but basically just cut, fold and gather your paper into signatures.
You’ll further prepare these by marking and pre-punching them. This makes it much easier to sew them together. Use the same template you used to mark the cover. Mark the tops of the signatures with a post-it so you don’t get them turned around. You want to make sure they stay aligned the same way you marked them.
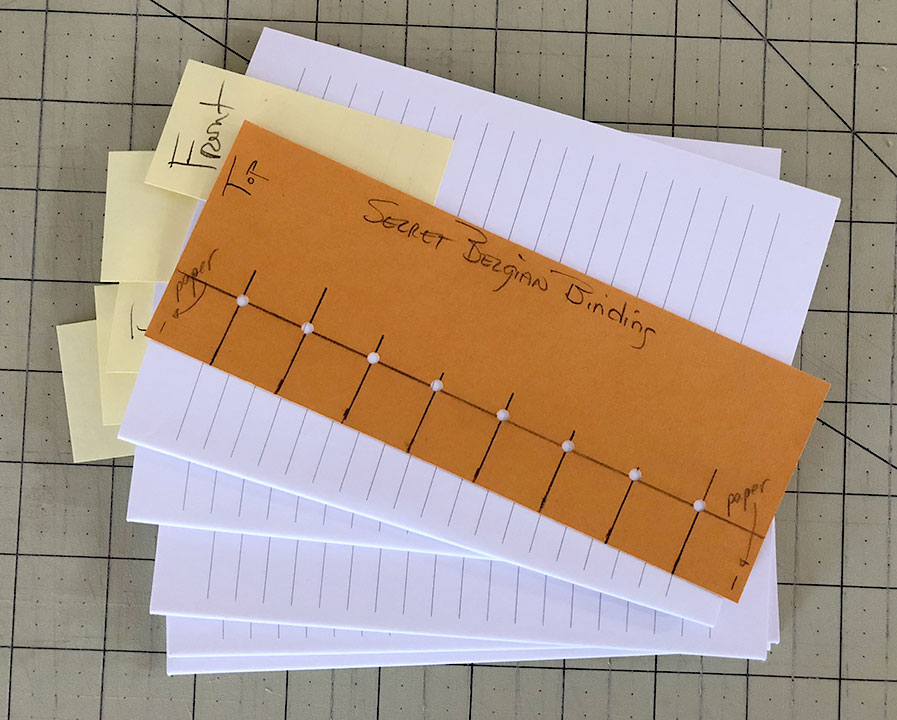
Jog the signatures together and lay your template on top, weighted down with something to keep everything in place. Use a straight edge to make tick marks along the edge of each signature. I just use a straight scrap piece of bookboard to mark against.
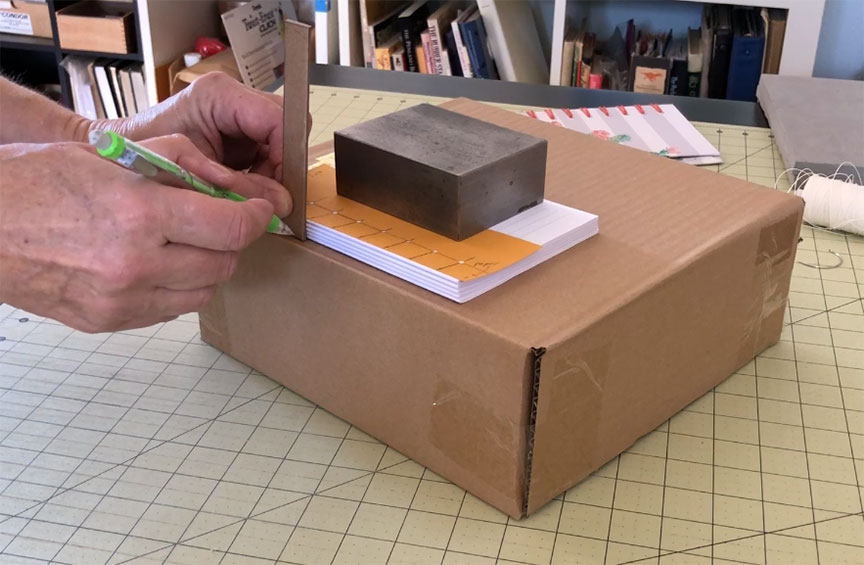
When punching the holes, it’s easier to have something soft to poke the needle into so I’m using a piece of foam as a base. I have the needle pushed into a wine cork to act as a handle.
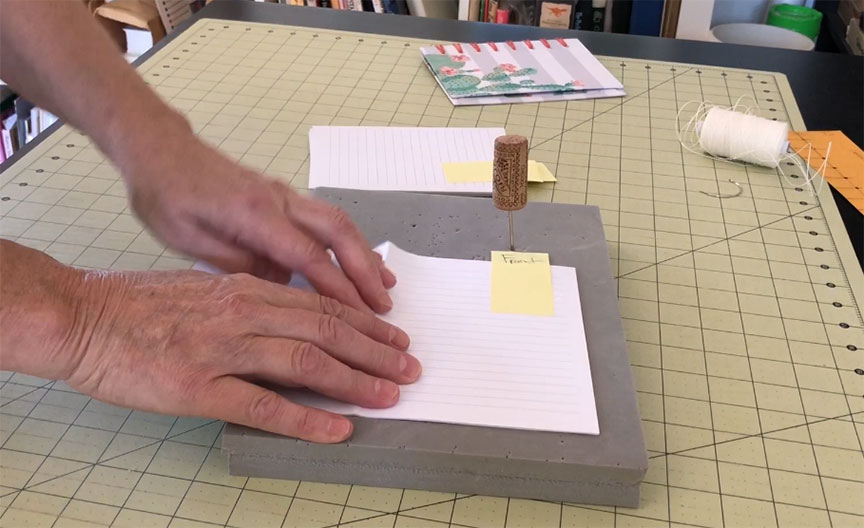
Open the signature up and lay it flat on the foam making sure to keep all of the pages jogged together. Poke a hole at each tick mark, keeping the needle perpendicular to the surface of the paper so your holes are straight. Do this with the remaining signatures.
Now the cover and the signatures are ready to be sewn together. Use a lighter thread for this, like a linen bookbinders thread. You’ll also find that a curved needle is useful for this particular binding.
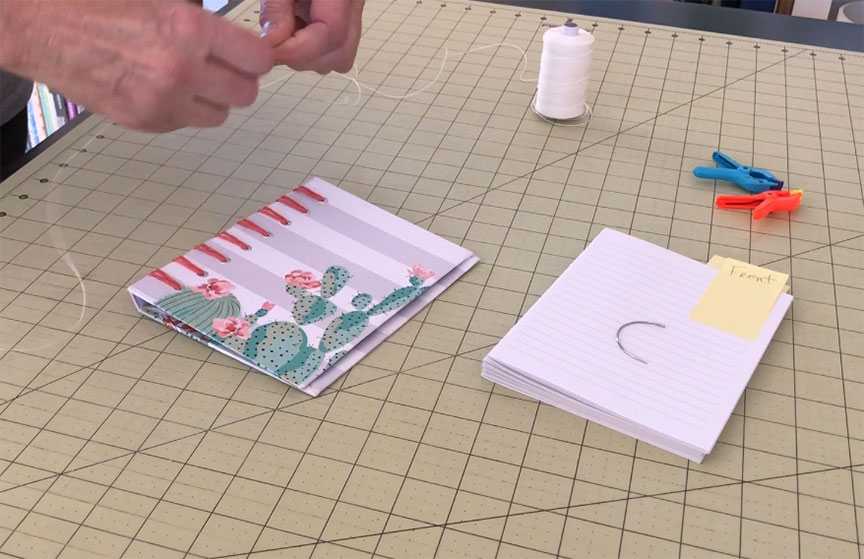
Measure out your thread. A good rule of thumb is one book-length of thread for each signature, plus extra for the tails so you can tie off the ends. I always give myself one extra length just so I’m not cutting it too close.
Start with the first signature and lay it flat on the front cover, aligning the edge of the signature with the edge of the front cover. It helps to clip this signature to the cover to keep it from flopping around as you sew. Clothespins work well for this.
Start sewing from the outside of the signature in the first hole to the inside and then go back out through the second hole. Be sure to leave a generous tail behind to be tied off later. You can anchor this tail under your clip to keep it from getting accidentally pulled out.
Now you are ready to attach this signature to your book. Sew under the second and third pairs of stitches along the spine, being careful not to accidentally sew through the thread.
Now sew back into the third hole in the signature and back out the fourth hole. You don’t need to worry about snugging up these stitches yet. Once you come out the fourth hole you will sew through the next two pairs of stitches along the book spine.
Go back into the next hole in the signature, out through the next one and catch the next two pairs of stitches along the spine. In my example there are only three sets of stitches along the spine that will be sewed under.
Continue this pattern to the end of the signature and then snug up the stitches. These shouldn’t be overly tight, just snug. Your last stitch should have ended up on the outside of the signature.
Place the second signature into position. Again, you can clip this in place to keep it from flopping around. This also makes it easier to move in and out of the signature as you sew. Sew in through the first hole and out through the second. Then sew under the same two pairs of threads along the spine that you sewed under before. Continue this pattern to the end of the signature.
When you get to the end of the second signature you should be on the outside of the signature. Snug up the stitches in both signatures. All of this should be snug but not aggressively tight. Tie a square knot with the working thread and the tail, and trim the tail. This will be the only time you tie a knot until you get to the very end of the project.
Add the third signature and continue the same sewing pattern – sewing into the signatures through the odd-numbered holes and back out through the even numbered holes, looping through the appropriate stitches on the cover, then back into the signatures. When you get to the end of the third signature, you should once again end up on the outside of the signature. You will join this signature to the others with a special stitch called a kettle stitch, which anchors the signatures together at each end.
First, snug up the stitches. Then take your needle in between the first and second signature, underneath the knotted joining thread at that junction. Move from the inside toward the head of the book. Pull the thread through and then take your needle back through the loop that’s created. Tighten this down.
If you want to see another demonstration of the kettle stitch, watch this brief video.
Continue this process of sewing in each signature, finishing with a kettle stitch at the end of each one. The kettle stitch will always go in between the previous two signatures. So, once you reach the end of the fourth signature, the kettle stitch will occur between the second and third signatures.
This pattern repeats until you reach the end of the final signature. You’ll make a double-kettle stitch here. First make a kettle stitch as you normally would, between the previous two signatures. Then make one more kettle stitch between the last two signatures.
Trim your thread and your book is done!
